Credit and debit card processing involves a series of steps to authorize and settle payments between a customer, a merchant, and their respective banks. This process typically involves a payment processor, a card network, and the issuing bank. The steps include authorization, authentication, and settlement, ensuring the transaction is secure and funds are transferred.
How Credit and Debit Card Payments Work:
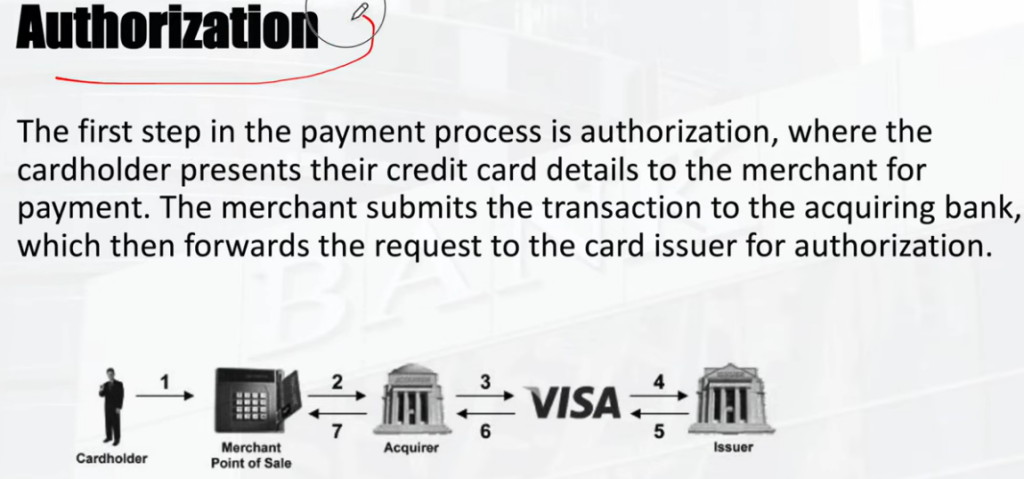
The customer presents their card (in person, online, or over the phone) to initiate the transaction. The merchant’s payment processor sends a request to the card network and then to the issuing bank, which verifies the card details and available funds.
2. Authentication: . This step involves verifying the cardholder’s identity, sometimes through additional security measures like CVV codes or other authentication methods.
3. Clearing: . The transaction details are verified, and the funds are essentially “held” until the final settlement.
4. Settlement: . The actual transfer of funds from the customer’s bank (issuing bank) to the merchant’s bank (acquiring bank) takes place. The merchant receives the funds, minus any processing fees.
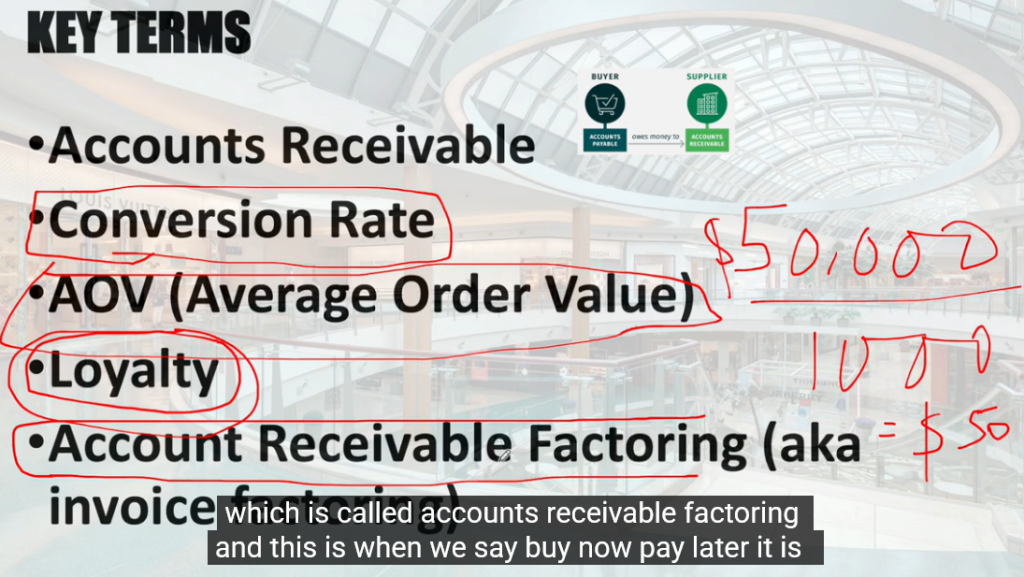
Key Players and Terms:
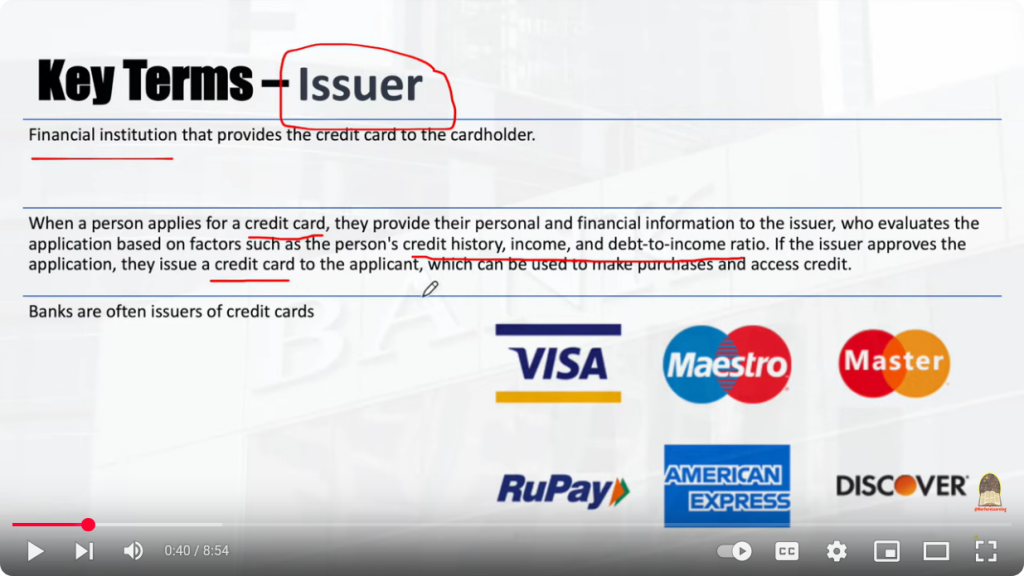
- Card Networks: These are the major payment networks like Visa, Mastercard, Discover, and American Express.
Payment Processor: This company facilitates the communication between the merchant, card networks, and banks. Issuing Bank: The bank that issued the credit or debit card to the customer. Acquiring Bank: The bank that processes payments for the merchant. POS System: Point of Sale system, the device used to process card payments in a physical store. Payment Gateway: The online platform that handles transactions on e-commerce websites. Processing Fees: Fees charged by payment processors and card networks for their services
Payment Processing Credit/Debit Cards
| Merchant | [10] Starts Clearing |ACQUIRER |
[11] Sends a clearing file. | IPS |
[12] Notifies about a financial transaction by displaying the transaction on the card holder account.
| ISSUER |
[13] Generates reconciliation files | IPS | & | ISSUER |
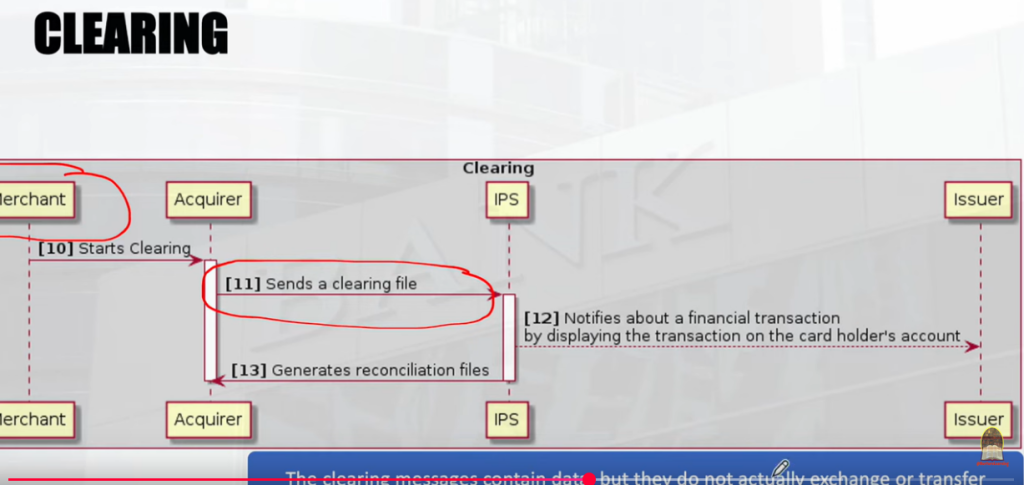
Process of Settlement is the last act before final payment.

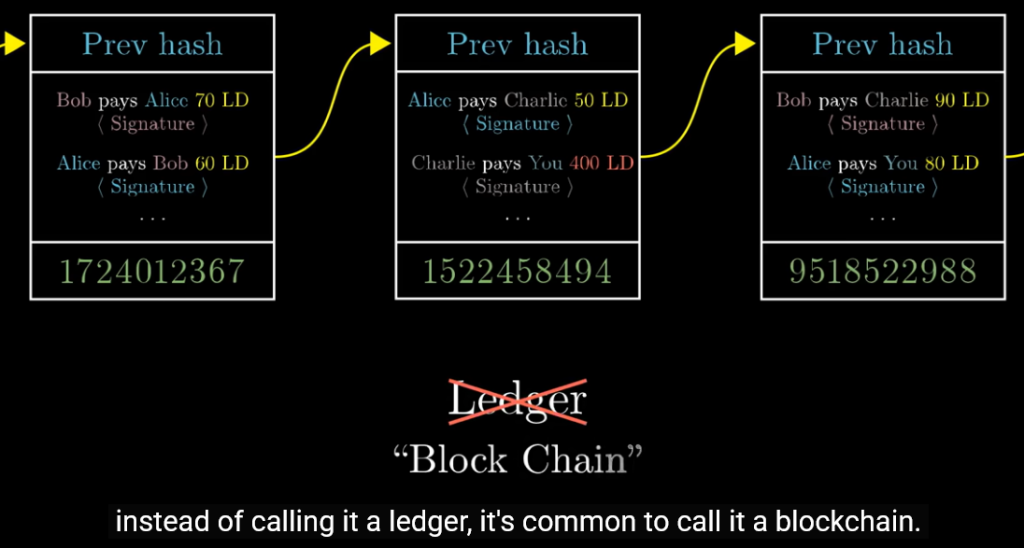
Ledger andor Block and with either work order sheet or not, andor fees at ledger and to each.
Base Ratio of Credit History is perfect and since 1994.

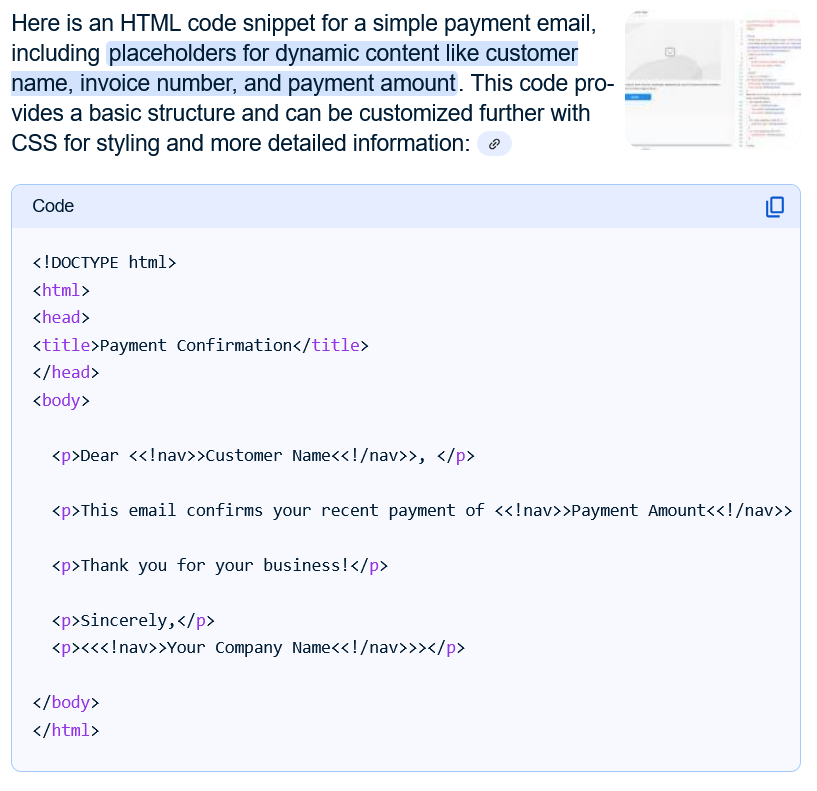
html
To clarify, you’re asking about ways to generate a URL or link that allows someone to make a one-time payment, potentially pushing a credit to a recipient’s account?
Here’s how that works with “URL Push Credit” or payment links:
What is a Payment Link?
A payment link, also known as a checkout link or payment URL, is a clickable link or scannable code that directs a customer to a secure payment gateway or hosted payment page to complete a purchase. It’s essentially a pre-configured checkout that allows customers to pay without having to sign up for an account or navigate through a complex website checkout process.
How are payment links generated?
- Many payment processors like Stripe, PayPal, Square, or others allow businesses to create and customize these payment links through their platforms.
- Businesses can generate a link for a specific amount using an Application Programming Interface (API) call or manually through a virtual terminal. According to Fiserv Developer Studio, this functionality is especially useful for situations like paying for goods after delivery or for services booked in advance.
- Some providers, like Online Check Writer, offer dedicated services to create and share payment links easily.
What is “URL Push Credit” in this context?
- When a customer clicks on the payment link, they are directed to a page where they enter their payment information (credit/debit card, bank account, etc.).
- This process effectively “pushes” the payment from the customer’s account to the merchant’s account or the designated recipient.
- This method is often referred to as “push payment” or “push-to-card” when the funds are transferred directly to a recipient’s card account.
- Push payments offer advantages like speed and efficiency, as transactions can be processed in real-time or near real-time.
How are URL push credits used for one-time payments?
- The generated payment link can be shared with customers via various channels like email, SMS, messaging apps, or social media.
- The customer clicks the link, enters payment information on the secure payment page, and completes the one-time payment.
- The funds are then directly transferred (pushed) to the merchant’s or recipient’s account.
In essence, a URL push credit for a one-time payment involves generating a payment link that, when accessed by the customer, facilitates the push of a one-time payment to the specified recipient’s account
eCMS Connect refers to a suite of integration solutions offered by Computer Guidance Corporation that connect their eCMS construction ERP software with other platforms, primarily for streamlining financial and project management processes. Two prominent examples are eCMS Connect for Corpay, which automates vendor payments, and eCMS Connect for Procore, which integrates with Procore’s construction management platform.
Key Features and Benefits:
- eCMS Connect for Corpay:
- Automates vendor payments using virtual credit cards, reducing manual processes and costs associated with paper checks.
Leverages Corpay’s rebate programs for financial benefits. Provides online tools and resources for managing the payment program. Eliminates manual and disjointed payment processes, fraud, and delayed payments. According to Computer Guidance Corporation, it can lead to increased productivity, enhanced customer and employee relations, significant cost savings, and improved financial management.
eCMS Connect for Procore:
- Enables real-time data exchange between Procore and eCMS for better visibility into projects.
Facilitates collaboration and communication between project teams, regardless of location. Provides access to eCMS’s productivity tools like content management, business intelligence, and mobile forms within the Procore platform. Allows for scheduling of data synchronization and email notifications.
Overall Benefits:
Automation and streamlined processes reduce manual effort and improve overall efficiency.
Cost Savings: . Reduced costs associated with paper checks, manual data entry, and potential errors.
Improved Collaboration: . Real-time data exchange and communication tools enhance collaboration between teams.
Better Financial Management: . Enhanced visibility and control over financial data and processes.
Scalability and Flexibility: . Built on a web services platform, eCMS Connect is flexible and scalable to meet the needs of different projects and businesses
The Country bank of Needham TM and Copyholds.
remove-endpoints
Description
Remove endpoints from an endpoint group.
The RemoveEndpoints API operation is the recommended option for removing endpoints. The alternative is to remove endpoints by updating an endpoint group by using the UpdateEndpointGroup API operation. There are two advantages to using AddEndpoints to remove endpoints instead:
- It’s more convenient, because you only need to specify the endpoints that you want to remove. With the
UpdateEndpointGroupAPI operation, you must specify all of the endpoints in the endpoint group except the ones that you want to remove from the group. - It’s faster, because Global Accelerator doesn’t need to resolve any endpoints. With the
UpdateEndpointGroupAPI operation, Global Accelerator must resolve all of the endpoints that remain in the group.
See also: AWS API Documentation
Synopsis
  remove-endpoints
--endpoint-identifiers <value>
--endpoint-group-arn <value>
[--cli-input-json | --cli-input-yaml]
[--generate-cli-skeleton <value>]
[--debug]
[--endpoint-url <value>]
[--no-verify-ssl]
[--no-paginate]
[--output <value>]
[--query <value>]
[--profile <value>]
[--region <value>]
[--version <value>]
[--color <value>]
[--no-sign-request]
[--ca-bundle <value>]
[--cli-read-timeout <value>]
[--cli-connect-timeout <value>]
[--cli-binary-format <value>]
[--no-cli-pager]
[--cli-auto-prompt]
[--no-cli-auto-prompt]
Options
--endpoint-identifiers (list)
The identifiers of the endpoints that you want to remove.
(structure)
A complex type for an endpoint. Specifies information about the endpoint to remove from the endpoint group.
EndpointId -> (string)
An ID for the endpoint. If the endpoint is a Network Load Balancer or Application Load Balancer, this is the Amazon Resource Name (ARN) of the resource. If the endpoint is an Elastic IP address, this is the Elastic IP address allocation ID. For Amazon EC2 instances, this is the EC2 instance ID.
An Application Load Balancer can be either internal or internet-facing.
ClientIPPreservationEnabled -> (boolean)
Indicates whether client IP address preservation is enabled for an endpoint. The value is true or false.
If the value is set to true, the client’s IP address is preserved in the
X-Forwarded-Forrequest header as traffic travels to applications on the endpoint fronted by the accelerator.
Shorthand Syntax:
EndpointId=string,ClientIPPreservationEnabled=boolean ...
JSON Syntax:
[
  {
    "EndpointId": "string",
    "ClientIPPreservationEnabled": true|false
  }
  ...
]
--endpoint-group-arn (string)
The Amazon Resource Name (ARN) of the endpoint group.
--cli-input-json | --cli-input-yaml (string) Reads arguments from the JSON string provided. The JSON string follows the format provided by --generate-cli-skeleton. If other arguments are provided on the command line, those values will override the JSON-provided values. It is not possible to pass arbitrary binary values using a JSON-provided value as the string will be taken literally. This may not be specified along with --cli-input-yaml.
--generate-cli-skeleton (string) Prints a JSON skeleton to standard output without sending an API request. If provided with no value or the value input, prints a sample input JSON that can be used as an argument for --cli-input-json. Similarly, if provided yaml-input it will print a sample input YAML that can be used with --cli-input-yaml. If provided with the value output, it validates the command inputs and returns a sample output JSON for that command. The generated JSON skeleton is not stable between versions of the AWS CLI and there are no backwards compatibility guarantees in the JSON skeleton generated.
Global Options
--debug (boolean)
Turn on debug logging.
--endpoint-url (string)
Override command’s default URL with the given URL.
--no-verify-ssl (boolean)
By default, the AWS CLI uses SSL when communicating with AWS services. For each SSL connection, the AWS CLI will verify SSL certificates. This option overrides the default behavior of verifying SSL certificates.
--no-paginate (boolean)
Disable automatic pagination. If automatic pagination is disabled, the AWS CLI will only make one call, for the first page of results.
--output (string)
The formatting style for command output.
- json
- text
- table
- yaml
- yaml-stream
--query (string)
A JMESPath query to use in filtering the response data.
--profile (string)
Use a specific profile from your credential file.
--region (string)
The region to use. Overrides config/env settings.
--version (string)
Display the version of this tool.
--color (string)
Turn on/off color output.
- on
- off
- auto
--no-sign-request (boolean)
Do not sign requests. Credentials will not be loaded if this argument is provided.
--ca-bundle (string)
The CA certificate bundle to use when verifying SSL certificates. Overrides config/env settings.
--cli-read-timeout (int)
The maximum socket read time in seconds. If the value is set to 0, the socket read will be blocking and not timeout. The default value is 60 seconds.
--cli-connect-timeout (int)
The maximum socket connect time in seconds. If the value is set to 0, the socket connect will be blocking and not timeout. The default value is 60 seconds.
--cli-binary-format (string)
The formatting style to be used for binary blobs. The default format is base64. The base64 format expects binary blobs to be provided as a base64 encoded string. The raw-in-base64-out format preserves compatibility with AWS CLI V1 behavior and binary values must be passed literally. When providing contents from a file that map to a binary blob fileb:// will always be treated as binary and use the file contents directly regardless of the cli-binary-format setting. When using file:// the file contents will need to properly formatted for the configured cli-binary-format.
- base64
- raw-in-base64-out
--no-cli-pager (boolean)
Disable cli pager for output.
--cli-auto-prompt (boolean)
Automatically prompt for CLI input parameters.
--no-cli-auto-prompt (boolean)
Disable automatically prompt for CLI input parameters.
Output¶ ClickNowforLinkedPortal to above contents.


Author: service
k